
A user in the 2013BAMCAL on Ravelry was having difficulty with telling which side was the “right” side of the crochet blocks. I posted a little mini tutorial and then decided to post it here, too. Maybe someone might find it useful.
To determine the “front” or “right side” of a crochet block there are a few cues you can look for. The “front” of the piece is more defined–you can clearly see each post, especially in taller stitches like DCs. Conversely, on the “back” the stitches are less defined making it look more like one solid fabric. There will also be a little ridge coming toward you at the base of the row on the back. (See the first photo of the two teal squares.)
I kind of describe the back of a piece as being “crochet static”. You can see the stitches but clusters and rows look like one piece from the back, and like individual stitches from the front.
On a piece that’s turned after each round, you’ll have a front and a back on both sides! (See the second photo of the pink square.) The center is usually going to be worked right side facing so it will have the defined stitches. In the example, the rounds with the X on them are the “back side facing” stitches. You can see the ridge at the base of every other row on both sides of the work. Here you can also see front side facing and back side facing stitches next to each other to compare the front and back appearance.
Of course if you’re legally blind and crochet by feel, this doesn’t help. But that’s probably a subject for someone else to address.
I think this is probably difficult to tell for a lot of people. I have seen printed, professional crochet books with photos showing the back side of the blocks. Hopefully the blocks aren’t embarrassed by having their derrieres shown for posterity…
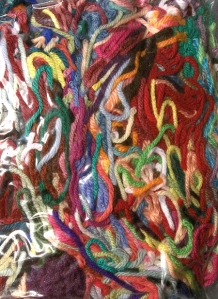 I have a confession. I’m a yarn scrap hoarder. I can’t bear to throw the little things away! I put them in a big zipper bag and all the colors are pleasing to look at.